Looking back I had a wonderful crafty year working with clay, metals, punches, glass , paints etc.. and really want to do more next year - new items for me this year were of course the Big Dragon Eyes, getting back to glass painting and working with kiln glass - and frits and of course the crazy wine bottle slumping that I totally enjoyed
Looking to get a new intermediate size kiln in the spring with possibly a final bigger one for summer so I can work larger glass pieces and get some ideas out there
More metal - more forming and cutting - I totally enjoyed my ring class - and using silver again
I look forward to putting more time into my crafts this year - so wishing everyone a very Happy New Year

November Give-A-way - redraw winner is
I do state on my draw that you need to have an email address that I can contact you with after the draw
Unfortunately the winner for November did not have one -so it has been impossible for me to contact
so
I said that If I did not hear from them by today the 10th I would do a redraw - so drum roll and the winner is Here Bead Dragons !!!!
I will contact you via email and if you can send me your mailing address I can get this out right away and hope that you can get before Christmas !!!
Congratulations
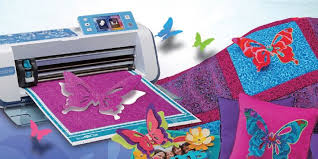
Scan N Cut by Brother -JPEG or JPG images or text to Scan n cut
Haveing a great time with my Scan n cut - all the things I've made so far - and took a 3 hour class this week and now know how to do more !
Very excited as I'll be doing vinyl cut outs etc..
will be outlining some amanzing things to share
Very excited as I'll be doing vinyl cut outs etc..
will be outlining some amanzing things to share
A lot of people want to do text and images and its easy -
Taking a JPG/JPEG and making into a SNC file
In this sample I am using a Text Name but you can create a whole page document to bring into your scan n cut
I started by finding the font I wanted - In this case I want "Oliver" this is the Frozen Font that just about anyone with a little girl in the family needs - go to http://www.1001freefonts.com/

search for oliver - scroll down the page and there it is - download -

now you can save the zip files in folder -

but I use word a lot and if I want for something else I'll just grab again - open the zip folder and select the font and click to open- this gives you a page of the fonts - top left corner has install - select and it puts it right into your word -

Open word and type in you text -
 you can either choose at this time the font or just type and then highlight and change - made the size about 150 so its big and easy to see and work with - best to use black as the color so that it is recognized easier for the outlines -

Now there is a beautiful app called the SNIP Tool in windows -
 its under your apps in 8.1 as windows accessories - I have it fixed to my tool bar - click on the snip tool - select new - highlight the text (try not to get the cursor in the clip) it will come up in its own window - now saveas (name it to a location you can find after) and make sure its a JPEG/JPG file - ok now we have our text


Open canvas - select new project - select the leaf box - 

choose file - select the file you just saved

choose file - select the file you just saved
to the right at top two boxes lets start with the "outline" box and you will see another box with max number of colors - now reduce that to 2 - and hit the preview button - and you will see blue lines around the letters - but o dear - the centers in A or D etc are not highlighted - and we want those - so go up to top and choose color - and then preview - voila
if your satisfied with the outlines then click ok and it transfers your design to the mat for manipulation


Each letter can be moved

You may note there are heavier outlines on certain areas -

you can delete the extra cuts by highlighting and deleting (garbage can or your delete button) -

to group them just select all by highlighting all the text - then the edit tab - and group - now its all one group to move around - you can also reverse this with the back arrow at top

or highlight and ungroup from the edit tab
- to save - click the box with the down arrow at top

and this saves to cloud with Brother -
or hit download

and it will create the file for cutting -(remember where you save it - as you take from file and move to your USB -
if you practice this you will have a great time with vinyl and images for cutting because I sure will -
you can delete the extra cuts by highlighting and deleting (garbage can or your delete button) -

to group them just select all by highlighting all the text - then the edit tab - and group - now its all one group to move around - you can also reverse this with the back arrow at top
or highlight and ungroup from the edit tab
- to save - click the box with the down arrow at top
and this saves to cloud with Brother -
or hit download
and it will create the file for cutting -(remember where you save it - as you take from file and move to your USB -
if you practice this you will have a great time with vinyl and images for cutting because I sure will -
Still Slumping.......
So Saturday morning I put in the pattern sheet and a clear bottle with hopes that I would have success
I coated the ceramic pattern sheet - I thought well but Sunday morning it was cracked and stuck to the mold .......
I had no problems all week slumping bottle flat on the fiber paper (thick) and on the kiln shelf but now I believe its possible that the boron could be the problem - maybe - will check it out
well I'll wait till next week to see as I poke the stuck pieces off my mold and use a new can -
I have switched to my old fusing schedule which is much faster and I do two bottles a day for regular flat bottles
going to give the lava cloth a try and put posts to the side to see if I can make a curved dish
then I can use the same schedule
Wine Bottle Cheese Trays
Yup coming along - every morning at 6 I go to the studio to pull out a cheese tray out of the kiln and put a new one in -
I clean and then put some rafia on the neck as decoration and a cheese knife - then into a bubble bag ready to go to for the show on the 17th
up to 8 and 1 coming out in 3 hours and another going in - this time a clear on pattern - as I said if I keep this up I'll have 20 for the show


I clean and then put some rafia on the neck as decoration and a cheese knife - then into a bubble bag ready to go to for the show on the 17th
up to 8 and 1 coming out in 3 hours and another going in - this time a clear on pattern - as I said if I keep this up I'll have 20 for the show


Slumping Along.........
Since last Saturday I have been slumping wine bottles for cheese trays - up to 8 so far with one in the kiln now
So far all green flat bottles - tomorrow will attempt pattern clear bottles again - see if I can get about 10 of those ready for the 17th mini show at the school Hoping for a total of 20 cheese trays
Need to work on a couple of things to prep and get ready for the quicky set up we have to do as well
I have picked out my next kiln - the sort of mid size before getting the really big one
A Paragon CS19D - is a Clamshell as well as a top loading - this should suffice for next years big purchase - I'll be able to do at least 3-4 bottles at a time and be able to slump some nice plates and trays that I want to do - I want to get back into painting larger pieces as well

my eye is on a really nice tray the "LENA" glass slumping mold - I may get some mold before the kiln shows up
So far all green flat bottles - tomorrow will attempt pattern clear bottles again - see if I can get about 10 of those ready for the 17th mini show at the school Hoping for a total of 20 cheese trays
Need to work on a couple of things to prep and get ready for the quicky set up we have to do as well
I have picked out my next kiln - the sort of mid size before getting the really big one
A Paragon CS19D - is a Clamshell as well as a top loading - this should suffice for next years big purchase - I'll be able to do at least 3-4 bottles at a time and be able to slump some nice plates and trays that I want to do - I want to get back into painting larger pieces as well
my eye is on a really nice tray the "LENA"
glass slumping mold - I may get some mold before the kiln shows upResults for November Give- Away - THE WINNER IS ........
The winner of the November Give-A-Way is
LisaAnn Please enable your blog with an email - if I do not hear from winner by Decembe 10 I will pick another winner
if you can email be at dread@deborahread.com with our mailing address I will get your prize out to you this week
LisaAnn Please enable your blog with an email - if I do not hear from winner by Decembe 10 I will pick another winner
if you can email be at dread@deborahread.com with our mailing address I will get your prize out to you this week
Busy weekend - but not for crafts
Busy weekend - my daughter had knee surgery on Friday - got postponed from 10am to almost 1pm so we were in the hospital from 8am to almost 5pm - all day long ........ but she came out of it well and happy - and knee looking good and she is already up and about on crutches
I scored big time this weekend on bottles - some specialty Beer Bottles from my Niece from a Brewery in a local town close by - little brown jugs and they have enamel labels which I love


I scored big time this weekend on bottles - some specialty Beer Bottles from my Niece from a Brewery in a local town close by - little brown jugs and they have enamel labels which I love

cant wait to flatten these babies into something - maybe spoon rests or I may make a ceramic tray so I can make a dish from them
then the big haul of the WISERS whiskey bottles from my daughers inlaws

I started washing and getting the labels off but there were soooooo many I ended up with about 15 - these are the best wide clear cheese trays and I use my pattern - (if I can figure out what the heck I am doing wrong - either not enough boron or problem with the ceramic pattern ) either way - big score
then on sunday spent some time with granddaughter crafting again - she loves my scan n cut machine

making a wreath of paper snowflakes cut from the machine
Cutting Machine Challenge
Well I have been surfing and joining blogs and facebooking about the Scan N Cut and having a thoroughly great time of it - then I saw someone made these ......

the houses are amazing - found it at svgcuts.com and bought the kit (under 9.00 cdn) what a deal !
so I guess the challenge will be if any of the items will even look similar
some of the houses I've seen others make are totally amazing !!!!!!!!
the houses are amazing - found it at svgcuts.com and bought the kit (under 9.00 cdn) what a deal !
so I guess the challenge will be if any of the items will even look similar
some of the houses I've seen others make are totally amazing !!!!!!!!
Christmas Craft time
Last weekend I had my youngest granddaughter over and we decided to make christmas ornaments -
we did paper chains, and started using my Brother Scan N cut I bought early last year and never hardly got to use it -
WE had fun making snowflakes, and paper ornaments and she made up a card for her mom for after surgery (this friday ) she learned how to use the machine and to select things for cutting - she really enjoyed it as I did

the butterflies were for her moms card and she did everyting - put the paper on the cutting mat, put in the machine, selected the parts and glued them together

I was having fun with some other 3d ornaments I downloaded and converted for a cutting file - so I learned to do something too

ta da

Loved these patters there were three sizes

these were patterns in the machine I just cut 4 pieces for each 3d snowflake and glued together

I bought the round flat type plastic ornaments at micheals - 50% off right now
simple decorations
consist of
plastic ornament
green tree pieces from dollar store and you but to fit in the ornaments about 2-3 " long
put a few in ( you will need wire nippers to cut)
dollar store has red berries in a bag and long big ones - cut them up so they are singles
snow - this I had for years but I think I got from micheals - a bag will last a long time
a funnel to put the snow in the ornaments
so its greens first red berries or small pine cones if you can find - even frosted greens then the snow

they turn out to be really cool ornaments

crafted out
Update - on fusing - and the wine bottle slumping problem
Last week I posted that I ran a clear wine bottle slump onto my ceramic pattern mold and it cracked


I ran the cycle that worked perfectly when my studio was about 65 - 70 F from 6:15am
thinking that the cool down late at night caused the cracking - was about 55F when I went in to see the next morning - hmmmmmmmmmmm
I had a suggestion from Rose Mary Clay to adjust my schedule and add further cool down - so that it was slower -
Before I did that I ran another Green Bottle slump on my ceramic patter from night to morning - thinking the day would be warmer - same temps around 50-55 F
NOPE - it cracked - even more - but I did notice it was sticking more to the mold
hmmmmmmmmmmmmmmmmmmm
hmmmmmmmmmmmmmmmmmmm
On the weekend I warmed up the studio by turning on the heat friday night and putting another wine bottle on - a clear (not that it really matters
changed the cycle since it was warm to sit and do in the stuido so that I added another couple of segments and time for holding -
changed the cycle since it was warm to sit and do in the stuido so that I added another couple of segments and time for holding -
so excited saturday afternoon- to open and it was again cracked - hmmmmmmmmmmmmmmmm
noticed again harder to get pieces off - I cleaned and sprayed the Boron on for every firing - thinking maybe not enough
so now I need to do a slump WITHOUT the pattern mold and straight onto the kiln shelf with kiln fiber
I had turned off the heat last night - so the building cooled down to about 45F this morning - and
Voila - the bottle was fine -
so .........
I need to double check how much boron is actually getting onto my ceramic mold - am I possibly not getting enough on (I've made about 10 with no problem - with one only the weekend before the trouble )
it also could be the glass being fine on expansion but the ceramic piece not expanding and contracting in the cold the same -
any way - had fun - cleaning the studio - moving things around - bringing the last of the electronics - liquids down to the house for winter - I'll only take things up and put on heat when it might be sunny weekend and it helps heat the studio
I'll need to clean up the basement studio so I can at least torch
got a great haul of bottles on the weekend

10 clear wine bottles and some more of the green glass sparkling water bottles and a cool liquor bottle

these are the wine bottles I bought - got 48 of the 1L (left ) and 96 of the 750ml (right)
and deciding on the next kiln
either a pargaon 19CSD (double opening ) or go for the 26"
I am thinking the 19 for the next intermediate then I'll go for the BIG kiln
DONT FORGET THE GIVE-A-WAY !!!

GET YOUR NAME IN FOR THE GIVE-A-WAY FOR NOVEMBER - GO TO THE GIVE-AWAY THREAD - SEE SIDE BAR AND CLICK HERE
JUST ENTER YOUR NAME !
No Boho today just a Boo Hoo
Well its officially too cold to fuse in the studio now - I had a wine bottle in the big kiln yesterday - when I got home it was still 320F and when I left for bed it was down to 225 so I left it till this morning
Rushed up at 6:10 to pull it out and possibly put another in - - it had cracked - the studio was 55F - a tad cold and probably brought it down too quickly at final cooling.
so unless I warm the shed (oops studio) up on the weekends I'll have to wait to do it then
Picking up 144 wine bottles tonight - at least I'll be ready to go for spring
Boho #3
Got to etch, cut and make a ring - even got the pattern from Leslie last week
 so now mine will actually look like everyone's first rings
Same as before - I cant stop using the dichro cabs - I have a few ......

even got to cut another couple from the left overs - smaller saddle rings


Same as before - I cant stop using the dichro cabs - I have a few ......

even got to cut another couple from the left overs - smaller saddle rings

Finished Boho #2
Finally this morning - turned on the heaters last night - lovely this morning - finished soldering the back of the ring little embellishment, tumbled and fitted the dichroic glass in the bezel
the first pic is when I was partially done - note the color of the glass - very transparent

 same piece of dichroic glass just the background has been darkened

I colored the back of the bezel with a black sharpie and used a bit of j-b weld to hold the stone in place (not finished quite burnishing it down - waiting for the glue to dry
but you can see the extreme change in reflective color from the glass
the first pic is when I was partially done - note the color of the glass - very transparent


small flower from shot plate
I colored the back of the bezel with a black sharpie and used a bit of j-b weld to hold the stone in place (not finished quite burnishing it down - waiting for the glue to dry
but you can see the extreme change in reflective color from the glass
NOVEMBER 2015 - GIVE-A-WAY
November give-a-way is now closed
YES !!!! I am doing a Give-A-Way in November ! A FAT CAT PENDANT
Same rules as before:
YES !!!! I am doing a Give-A-Way in November ! A FAT CAT PENDANT

Has a little articulated mouse hanging from the bottom
Same rules as before:
just make a comment here on this thread and I will pull a name at random on the 1st of December
No cost to you and I ship anywhere in the world to the winner
Just be sure your blog comment has a link to your email address- no anonymous please - update your blogger information as sometimes its hard to find you
Have a great month !
November Give-a-Way is now closed
HAND OF MAN BOOTH SET UP
Here is what my new booth set up looked like
Cons - didnt like the feet extending into other booth so I had to pull them in - which made my booth smaller
cons- not sure of back end set up with small table - maybe none at all or shorten and give myself 2ft at the back of the 10ft and this way the whole back is available to use - ahhhh will have to wait for sprint to set up outside and see how it goes for testing
Pros' - love the fact that everything can be seen - its hard to choose when things are packed tight on the tables or not at eye level


Subscribe to:
Posts (Atom)