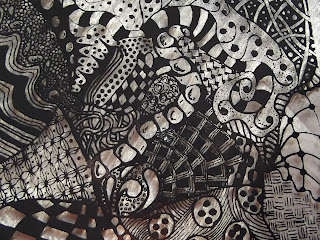
Screen Printing on Glass


I will be using a screen that is already made up (from my pottery/clay screening class I took at Pine Tree Potters) (I will be soone showing how to make one of these)  and using a glass paint - Reusche Black Trace DE401 mixed with Thompson Screening Medium (Misible with water - which means easy water clean up )

First I put together my screen printing assembly - a wood back (got at curry's its a light plywood type box frame but I am using the back ) assembled my screen printing hinges (again curry's or Dick Blick in the States)
When assembled it gives space between the hinge and the screen of approx 3mm - my glass is approx 2mm thick.  Once you have the hinges on the back - These hinges allow for you to swap out screens easily


I block off around the image with painters blue tape for easy clean up later and it gives me a space to keep the paint when screening as a rest space. This makes for easy clean up after

(space between the hinge connects top and bottom have the 3mm space which allows for a sheet of glass to sit between without crushing )


When I tape the back board - I put a white sheet of paper in the centere so I can see the image after screening 


Once I have it all blocked off I make my paint.

Using Reusche Black Trace DE401  - comes in various sizes - and you do not have to use black - there are lots of colors- and you do not have to use Reusche there are other enamels out there.   I'll be using some Thompson enamels shortly
and the A14 Thompson Screening Medium


I mix with a pallet knife till it is sort of like a syrup - not too thin and not too thick - hard to describe - too watery and it will pool on the glass - too thick and you will not get it through the screen.  If you make it too thin - it will pool and all you have to do is clean up and start over.  - too thick and your images are not clear and may be missing in spots - clean up and start over.


I place a clean sheet of glass on the back board - I lower the top and make sure that where the edges meet I have tape over - this just ensures I am not pushing paint where there is no glass. and ensuring I will not tear the screen by pushing on the edge. The tape re-enforces the area. (most cut sheet is the same size so you do not have to do this for every sheet of glass.   I try to position the white sheet so its within the sheet of glass.


Once mixed I pour a line at the bottom of my screen.   Just pour onto the tape - this is what I meant as a resting spot for the paint.


I take my squeegee  (which needs to be slightly wider than your image) and lightly run it over the screen (not touching the glass ) this is called flooding the screen
(see my hand holding up the screen from the glass)


I put the screen down on top of the glass (and holding it down tight)  I push down and draw down the squeegee to the bottom in one motion.


Holding the squeegee and the frame- the screen will lift from the glass and then  I slowly lift and pull out the glass and put to the side .


 I hold up the screen frame and flood the screen again. (pulling the squeegee to the top)  (add more  paint if you do not have enough to flood the screen completely.   and repeat.

Because its glass paint it may clog and after only a couple of screenings you may have to clean and repeat the process.

I only had enough leftover paint  to do two screenings. Which I was happy with . This will make me about 35 pieces for my lampwork beads
I sat out to dry - takes quite a while as the screening medium is like an oil - so I set in the sun they will dry - - when wet they are shiny - when dry they are a matte finish  to speed up drying I  use a hair dryer or a kiln on low - or my electric fryer as its like a huge cup warmer -  I want to cut into pieces and fire - or I could get out my big kiln and fire  as one big piece and cut later - choices -  (if not dry enough  before firing it can bubble and pop off )

Clean up is easy - just use water .
I love my spray hose that screws onto the tap (if you have a tap that you can screw on ) or a hose will do just as well -just not too powerful or you could ruin your screen)  it cleans up the screen rather well - just enough pressure to push the paint out 

Very happy with the results - clean and crisp 
Best part is if you mess up you just wash the glass off and start again 


Creating Copper Discs for Bead Caps

One of the items I like is to use bead caps from copper.  As you see in the finula pins I have been making I like to create with a hole, put a design and cup them.

Once way is to buy the copper circles from Metaliferous in NY  another is to get a disc cutter and make your own.

Not sure where I got this one but I like it because of the clear acrylic top 
In this pic cutting 18g copper circles 
You would be impressed if I had cut all these but I did not 
I got the circles from metaliferous - after I was cutting I remembered I had some in my enamelling supplies so off I went and grabbed them.

One of the tools I bought a long time ago was a hole punch - it has various sizes and does a great job and is easy to use 
I put  one side of the handle (the bottom) into the vise.  
It comes with an adjustable piece that lets you set it so you can repeat the hole.  If you work out the center on one of your pieces you can set very easily and makes punching the hole consistent 
so you can make a ton of center punched pieces for stamping.

I will be attempting to etch so I made up a bunch so that I can either put the pnp  blue - but they are so small - but I think I want to try a resist by using a rubber stamp - my zentangle texture mats as another way to transfer the designs 
that is to follow 


Hadar Metal Clay Bronze Nude, Faces and Lentil

In the midst of making some more items using the Hadar Metal Clay -
I make glass nudes freehand and off rod that are about 4 inches in length  and 3d so I decided to take the glass figure and use the two part molding compound to make a mold to use with the clay.
I did a quick mold so its not perfect - but I like less than perfect as the piece I want to make is not going to be symmetrical
with a silicone mold you can have overcut  as when the clay dry's you can easily remove 
the metal clay nudes are not full 3d - they are more hollow at the back 
still needs work but I may just cover it with a toga of mixed patterned clay like my first face 
I'll further sand and decide on how I want to use it or just fire it a bronze nude 
More faces in the works and a lentil 


Heartbroken - My Cat of 19 years passed away tonight

I am so heartbroken and upset - My cat  that I have had for 19 years passed away tonight.
He had not been well for the past month - the vet thought hyperthyroidism - and we got medication but it really never got him back to health.  The last few days more weight loss and finally this morning could hardly walk
tonight  he was beside me until he finally passed.
Its so hard to say goodbye to not only my pet but my friend.  He was born on the farm and travelled with me to the U.S. where we stayed for 8 years. . We came back 7 years ago - back to the farm where he was born and where I'll bury him tomorrow .I will truly miss this wonderful feline.

Jerry Bear Read  - March 15, 1993 - April 23, 2012  

Fibula - Shawl Pins - step by step

Step by Step making a Fibula Shawl Pin
Date:   4-21-12


At the  final version  and as I make them I make changes as I go - I've taken apart the copper ones (even though I love the copper) to do a mixed version of silver and copper.
Playing with different gauges of silver wire -


 the step by step is 12g - I found the 12g a bit thick so maybe a 14 would be better - your choice.

Pick out your wire

I found working from the pin side first makes it easier to tighten the beads on the pin and the curly part at the end is your left over with little waste.
The pin length will depend on the beads your going to apply so if you have a piece of scrap wire assemble your mix. and add about 1/2"

Tools:  Round Nose Pliers, Chain Nose Pliers, Side cutters.
Nylon tip - less clean up from dents in the wire but you can buff them out 

Pick out your beads and findings - I had my lampwork beads, some sterling silver plated beads, and plain copper bead caps I made 

I measured out my beads on a piece of wire then cut the very tip so it was sharp ( use your side cutters backwards - this time you want a pointy end ) of  my 12g wire - dont put beads on yet 
what your measuring now is where your going to start to wrap your wire around the give yourself about 1/2" past your beads just to be sure - it can be cut down if too long 
In this case approx 4.25" 
then I took my round nose pliers and wrapped it round twice
scraggy looking pliers - were orginally dipped in the plastic protection stuff  and somewhere along the line I tried using the tips with a too thick of wire and bent them - but their my favorites and I was working towards the back of the pliers.  The thicker wire is harder to work with even though it is soft wire

this creates your spring action - like a safety pin 

then I added my beads - you can add dangles, charms etc.. mix and match anything goes 

Once on push to end and bend at a right angle with chain nose 
get it as close as you can - if not you may have to put a bit of wire to tighten it up and push it in or flatten slightly to hold the bead tight on the wire - there is always a fix 
Then using round nose bend back down
side by side and pinch together  - does not have to be a tight side by side 
the using round nose bring the tip down to form the clasp 
Slighty bend the pin - I use my thumb and draw it under and it slightly bends - I like using my soft emery cloth
The end should only be out side the clap so trim it back - if you use your flush cutters backwards - in this case you want a pointy end to file later

With the leftover wire start bending it back and forth with your round nose pliers 


I like to tap it flat  with my chasing hammer after you may need to pull the design tighter as hammering pushes it apart


add dangly things to the  end, charms, beads, metal clay or make your own 
got carried away and started making more 
I do like making the dangle type as I remember years ago making dangle type bracelets with wire designs
so much fun


More Bead Pins or Shawl Pins or Fibula Pins - Samplers

Fired another 3 kilns of fused pendants and made some more tester bead pins - found they can be called a Shawl pin or Fibula Pin - this time with copper
Getting the design down to where I want it 
wire wrap ends etc... copper bead caps - but I'll etch or stamp to dress up 
possibly dangly things as well 
pretty rough - needs clean ends and some straightening of the wire  and some buffing - need to use my nylon pliers so I wont leave any marks 

Baby Chicks - Cute or What !

Have not had baby chicks on the farm in a long time
My daughter decided she wanted chicks this year at her new house - but she is working this week with me so they are at my house till Friday.   They come in a small box  so we had to find something to put them in, we had the water container  and the feeder  and shavings  but the heat lamp didn't work - luckily the bathroom is really warm so they survived the night.   Day olds - they are so cute


Cant get the image of that big yellow chick from HOP out of my head when I see them 

Wire wrap Bead Braceletes

Long ago I took a Connie Fox Class and made a ton of these - Havnt made in a long time  so while I was fusing and since I had the pliers out for trying to make the bead pin - I thought I'd start up some bracelets.
I'll need to make some new beads for the sizing but I think I'll make up a bunch for my shows
I use a 10g silver wire to make the base and make my own twisted wire and the beads