This weekend - my wrists is not too bad so I am going to do a craft store crawl -
The first place I have to get to is
Tuckers Pottery - I want to see and pick up a few more glazes as I want to do some ceramic pieces up before the spring and they are only open from 9-noon on Saturday
http://www.tuckerspottery.com/tkps/index.php
I love going there - they have cool stuff and kilns to look at
The second place is Tandy Leather
http://www.tandyleatherfactory.ca/en-cad/home/home.aspx
I found this a couple of years ago - I love picking up a few more stamps (I use these on my glass as well as leather) they have cool conchos to buy
looking at these ones to pick up (you can buy online but I like once in a while for the touchy feely trip)
Looking at this geometric stamp set
looks really cool
If you have never done leather - its pretty easy - for stamping - I took a class at the shop and they have some great videos on line to follow as well.
Then I need to go to BeadFX - to get some of those Vintaj folders for my bigkick and to drop off some metal for a friend to pick up
I may go to Micheals
and to the new franchise that just showed up in my area called Deserres
http://www.deserres.ca/en-ca/?r=3&gclid=CIOwm9Xj9rMCFUZgMgodDEMAGw
and possibly Cuirry's if I have time
Metal Embossing Plates
While searching for wire I came across my book of embossing plates (stencils) (they have been lying in a box for 7 years with the wire and a few other things I forgot I had -(a lot of stencil making materials ) - I am organized - I just cant remember where I put them - these are typically for embossing paper but wondered if I could use them to emboss copper - since they are as thick as paper I should be able to roll them through the rolling mill just like the paper patterns - I have yet to come across pics on the internet of them in use that way - but then I havn't googled much on it as yet . When I shop I come across these every once in a while on sale and grab them - and I found that one of those dollar store photo albums holds them quite well - since its so cold it may have to wait til spring - but I put the book of embossing plates somewhere I would find them when I want them this time
Step by Step Wire Necklaces
Revision Date: Nov. 24, 2012
Will update as I go along
Materials you will need
26 g Wire - for use with the beads- I am using Nickel Silver
Will update as I go along
Materials you will need
26 g Wire - for use with the beads- I am using Nickel Silver
I chose nickel silver for economy, that it does not tarnish as much as silver and was easy to get in large spools. 26g as it is thin enough to go through most of the standard pressed bead holes.
14 g Wire - for base collar
Yes I ordered waaaaaaaaay too much but hey you never know when you want to make a 1000 necklaces
I also find if I order larger quantities it eventually saves on shipping (I think somewhere around 2019 I'll break even )
I got the wire from R. J. Leahy
http://www.rjleahy.com/Store/wire/kwi.htm
You can use Artistic Wire as well - I just find it a bit softer but will work just as well and most have this in their craft stock
You can use any wire you wish - silver, copper, brass to give various effects
Dowels or Knitting Needles - fairly large - or maybe even a couple of pens can work -
You want something round - that is not going to break as you twist the wire
Your end result will be a piece of twisted 14g wire approx 18" long- one end with a loop
and the other with two loose ends - one that you make a hook and one that you can design an open swirl
so that when you put it together the hook connects to the loop and the swirl hangs below.
This is your tBASE to work on
STEP 1 - BASE
Cut approx 3.5 ft of 14g nickel silver wire (if you have too much you can cut down and adjust - depending upon how big you need it )
fold in half over first dowel
then just wrap the ends over the second dowel (you dont have to do but one wrap) and I alternate - one going one way - one going the other
you dont have to be exact as we will be modifying the ends
Hold the dowel with the loop in your hands and stand on the second dowel
start twisting.(one direction only ) twist, twist till you get an even twist from top to bottom - the dowel tends to untwist when you stop so let go and see if it becomes too loose and then tighten up till your satisfied.
take out the top dowel and you have your loop end
take out the bottom dowel - these end looks fuggly and we will fix these but its time to measure
I like to just bring it around my neck and judge where I want to have the center fall - then I will cut back and make my hook and swirl. Here is where you judge for longer, shorter, tighter etc.
Here we finesse the wire ends
make sure you round out your necklace around your neck to see where they join - this helps in the end process
sometimes I see one end looks more like the hook or one end is longer and is best for the swirl
trim and curve for the hook and hook it into the loop - there should be enough tension to pull and keep it sort of tight (we can work more on it later)
take the long end and create your swirl
we now have our base
STEP 2 - ADDING THE BEADS
Cut a piece of your 26g approx 3 ft - This I can control and is easier to work with but that is up to you.
I like to attache one end first before I start adding my beads so they do not fall off the end or if I pull the wire from the table all the beads fall off (yup it happened)
So just take one end and do a simple wrap starting around the loop end
Here may be the hardest part of all - choosing your beads and colors
sometimes I start with all the same bead - like leaves and wrap all around
then second wrap will be next bead - like flowers and work them between the leaves
then add other mixes etc... till its full
My bead bag
I like the dagger type , leaves, drops and the little pressed flowers
feed your beads onto the wire - you dont have to fill the wire - just a few inches at a time
the process is put bead to base - wrap wire to front, bring wire up
bead to base wrap wire behind and then to front of new bead
you continue till you fill your first layer - sort of a backgrouind and then we add more beads
try not to kink your wire - be carefull of the loose end as you flip it around and can poke you ( might want to wear your safety glasses
more to come
Other Metals for Embossing or Micro-folding projects
In preparation for embossing I want to get in materials I can mix and match
I have my 24g copper sheet - I also have 36g copper sheet - I was looking up embossing and came across this web site
http://www.whimsie.com/aluminumsheetmetal.html
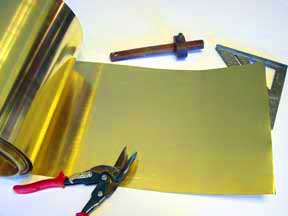
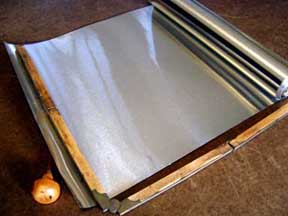
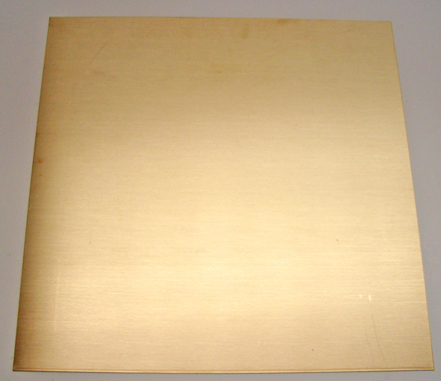
Has Aluminum, Brass and Bronze sheet in 24g and and thin (36g) foils in a variety of lengths
Brassaluminumbronze
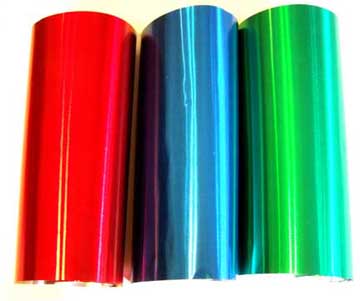
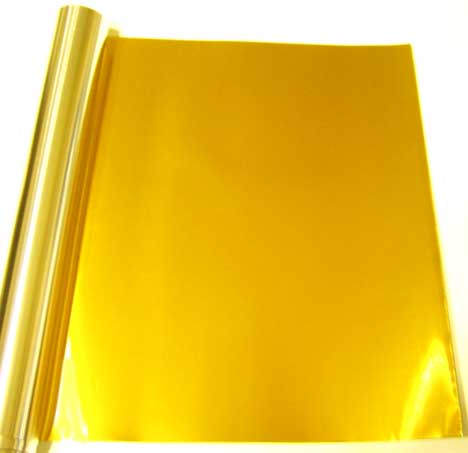
these look great for embossing images in other than copper (or if you can afford silver) the brass and bronze intrigue me as I always did my micro-folding - they have colored aluminum too aluminum gold coloured aluminum
the thinner 36g you can cut with scissors and the thin 24g is great with shears of some sort (xuron is a pretty good shear even for 22-24g) I so want some red aluminum to make microfold earrings
I have my 24g copper sheet - I also have 36g copper sheet - I was looking up embossing and came across this web site
http://www.whimsie.com/aluminumsheetmetal.html
Has Aluminum, Brass and Bronze sheet in 24g and and thin (36g) foils in a variety of lengths
Brassaluminumbronze
these look great for embossing images in other than copper (or if you can afford silver) the brass and bronze intrigue me as I always did my micro-folding - they have colored aluminum too aluminum gold coloured aluminum
the thinner 36g you can cut with scissors and the thin 24g is great with shears of some sort (xuron is a pretty good shear even for 22-24g) I so want some red aluminum to make microfold earrings
Another New Toy- Stampmaker
I have in the past made my own rubber stamps - and it was a messy job - I had made neat magnetic frames and poured the material between the frames and used my home made uv light system to make the designs - because it was always a pain I tended not to play with it (8 years have gone by since I last made my own stamp) and still have a ton of materials to use
I found this kit from Teresa Collins that is a great condensed unit and easy to use pouches to make stamps.
I have been following the blog and got a note that they would have a 50% discount for first 10 buyers and I was right on that - for Black Friday
I stayed up till midnight and tried - the coupon code would not work - I did not think that 10 people bought in the first 30 seconds - but you never know
so I stayed up till 2- since they were in Phoenix and allowing for time zone figured that is when it would be midnight/Friday for them -nope didn't work gave up ( I was tired) but got up at 5 tried, nope, 6 and just before I left for work, when I got to work I tried at 8 am nope .... this was getting frustrating then again at about 9am then I decided to check the blog -nothing to say any problems,,,,, next I tried Facebook and sure enough a few other people had problems with the code and they were fixing it - I sent an email in hopes that I could at least be part of the 10 that got the 50% (were talking 87.00 savings and half that savings was put to shipping)
Then I had to take my daughter to dentist and while sitting and waiting tried again and again. Finally it went through with the discount and was so happy. I hope some of the other people were able to get their discounted product . So now I cant wait - I can play with this one handed
Cricut Expression 2
New plan - since I cant use my hands - I need to shop for new toys
I went off to Michaels with the intent of getting the mini cricut for 99.00
I got there and they had for another 80.00 the cricut expression 2 (180.00)
I think I finally convinced myself that I really needed it ..........and it was on sale ! It was a sign - it was right when I walked in the door too
why you ask - I want to make paper templates to use with my little rolling mill that does not see any use.
I want to create embossed copper patterns - Yes I know I just got that crazy Sizzix machine for the vintaj embossing discs - but one can not have too many tools or toys
I picked up another couple of cartridges that are sort of lacy so we shall see what happens
I've wanted one of these for a long time and wanted it even more after reading and article where they used the cricut to make a paper pattern and they ran it through a rollling mill
and the prices have come down a lot (at least 1/2) since they came out
I'll see what I can make this weekend if I have time to play
(I've got to do that wire necklace step by step, visit the gem show downtown Toronto on the day of the Grey Cup and on saturday take my daughter and granddaughter to see the final twilight saga film and afterwards take them to dinner and glow in the dark golf.
The cast - is dwindling away - I keep cutting more and more off - it may be gone by Saturday and a splint on in place - its become quite annoying - and cumbersome
24g Copper Sheet (22 mil 16oz)
I just got 50lbs of 12" x 50ft of 24g - 22mil copper for playing with
I needed to figure out what was 24g was in Mil size - found this
22 Mil/16 Ounce Copper Sheets (.0216") 24 gauge: 16 ounce copper sheeting is a heavy weight copper sheet often referred to as "roofing copper" or "roofing flashing." It weighs approximately 1 pound per square foot. It's often used for roofing and flashing, various art and craft projects, DIY projects such as backsplashes, countertops and range hoods, electrical applications, research and development and much more. 16 ounce copper can be bent and formed by hand but is very durable. Metals snips are needed to cut this thickness. (Also check our patina copper sheets for a variety of uses including bartops and countertops. It is also used for for various wall hangings and artwork.)
so now I have it - I cant use my right hand to cut yet - I bought to use with my new sizzix machine and vintaj presses - I have some other ideas but I need two hands
roofing copper I know can be bought at roofing supply companies - I'll have to check it out
New Step by Step - - Wire Bead Necklace - This weekend
One of my favourite necklaces to make is the wire wrap necklace - you can use up all the odds in seed beads and speciality beads you have - or make patterns
Here are samples of the wire wrap - the base is Nickel silver - (plated coper wire) - German Silver (I'll put all the details in the step by step etc.
Definition of Nickel Silver
Nickel silver, also known as German silver,[ Argentan,[ new silver,nickel brass, albata, alpacca, or electrum, is a copper alloy with nickel and often zinc. The usual formulation is 60% copper, 20% nickel and 20% zinc.Nickel silver is named for its silvery appearance, but it contains no elemental silver unless plated. The name "German silver" refers to its development by 19th-century German metalworkers in imitation of the Chinese alloy known as paktong (Cupronickel)] All modern, commercially important nickel silvers (such as those standardized under ASTM B122) contain significant amounts of zinc, and are sometimes considered a subset of brass
Less tarnish and more economical to work with
Since I am laid up I am going to outline how to make one of these - great for sitting in front of the tv - making colour mixes - bag o beads - In fact I may be able to make them -cast and all
The base is a twisted wire that you shape and one end has a round hole (from bending around a knitting needle) and the other has the two loose ends - one for design and one for connecting - the best part is it connects to the front for easy wear.
Here are some old samples (prototypes) (at least 10 years old) and on the weekend I will do the step by step
Ringinator
I have had people ask me if I still use and if I like to use my ringinator
(mine only has wing nuts I like the blue anodized surface and the twist knobs)
THIS IS ONE OF THE BEST TOOLS I OWN - I will never hand cut or saw jump rings again
Was well worth the money. I keep modifying it every time I bring it out - last time I forgot to show that I added a recycling oil jug so I would not have to keep filling the oil reserve -
http://deborahreadcom.blogspot.ca/2011/08/ringinator-set-up.html (I need to do a bit of an update)
Its almost that time to start making coils and bagging them so I can do a run
if looking for the best way to make lots of jump rings get a ringinator
http://www.ringinator.com/
couple of videos on the side board - done when I had no clue of what I was doing and still got a ton (ok not a ton) of copper jump rings made.
I like to coil and coil and put them into bags and then drag out the ringinator - set it all up and take about an hour to cut all the rings I need for possibly 6-8 months of making bracelets and necklaces - then tear down - clean and put it away ready for the next time. I mark my containers with wires size, ID/OD and I jump between making all different sizes without much fuss -
(mine only has wing nuts I like the blue anodized surface and the twist knobs)
THIS IS ONE OF THE BEST TOOLS I OWN - I will never hand cut or saw jump rings again
Was well worth the money. I keep modifying it every time I bring it out - last time I forgot to show that I added a recycling oil jug so I would not have to keep filling the oil reserve -
http://deborahreadcom.blogspot.ca/2011/08/ringinator-set-up.html (I need to do a bit of an update)
Its almost that time to start making coils and bagging them so I can do a run
if looking for the best way to make lots of jump rings get a ringinator
http://www.ringinator.com/
couple of videos on the side board - done when I had no clue of what I was doing and still got a ton (ok not a ton) of copper jump rings made.
I like to coil and coil and put them into bags and then drag out the ringinator - set it all up and take about an hour to cut all the rings I need for possibly 6-8 months of making bracelets and necklaces - then tear down - clean and put it away ready for the next time. I mark my containers with wires size, ID/OD and I jump between making all different sizes without much fuss -
19 More Days of cast
19 days to go before its removed
I've finally got the swelling down and most of the pain is gone (I think the swelling was the problem )
Had to remove some of the cast while it swelled as my thumb was numb
I hope for peace and quiet this weekend and see what I can do now that my fingers are more limber
but I cant wait for this to be off
Hot Stuff- New Cast
Got my new cast today - went with my fav color
HOT PINK Fiberglass Cast
found out broke right through but stayed in place and broke a little bit of bone off the other bone on the wrist as well - another 4 weeks before we look again - what am I going to do - was going to get white so I could try zentangling with my left hand - I could still try - black on hot pink looks cool
I went with expectations of getting out of the hospital fast as I had an appt for 10:30 I got out at 2pm
Customer Results
One of my customers that purchased some of my PnP Blue zentangle sheets for etching - sent me a sample of her results
Congratulations Peggy Neer - They are wonderful